The Rolls Royce Wraith
Showing posts with label Makes and Models. Show all posts
5.07.2014
10.01.2013
Acura RSX Projector Headlight Installation Video
The 2002-2004 Acura RSX is a legend (although the Acura Legend was also a legend but you get the point). Renowned as one of the most tunable production cars of the second millennium there is no shortage of aftermarket accessories for the RSX and projector headlights come pretty near to the top of the list in popularity.
Spec-D Tuning's Aftermarket Headlights
Although the Acura RSX projector headlights shown in the installation video above are from Spec-D Tuning, the step-by-step instructions can be used with any manufacturer's product and can even be used to install OEM parts.
Related articles
9.19.2013
Rvinyl 2012 Honda Civic Projector Headlights Installation Instructions
Spec-D Tuning 2012 Honda Civic Projector Headlights Installation Instructions
Projector and aftermarket headlights in general are a great way to spice up the look of your car. In addition, many high-quality projector lights not only increase the aesthetic appeal of your ride but also augment its performance. Imagine the difference that additional candlepower can make on a winding country road or in the middle of an intense storm. Still for many people, installing aftermarket headlights can seem like a task best left to the experts. But, as you will see that is not the case at all.Preparations
You will need the following tools before you attempt to install the headlight and most of these are included in any standard tool box. Please contact us if you have any problems finding any of the tools listed above.- 1.4" drive ratchet
- a 6" extension
- 10m socket
- 5mm Allen socket
- a Handy remover

1. Open the hood. Yes, it may at first seem like a no-brainer but it is an important first step.
2. Remove the 12 plastic clips shown above. Be gentle as you do not want to snap these clips.
3. Remove the Phillips head screw from the fender well. A Phillips head screwdriver has the cross end as opposed to the flat head.
4. Remove the two 5mm Allen bolts shown above.
5. Remove the two plastic clips located at the top of the radiator supports. Again, be gentle with the fragile clips.
6. Remove the front bumper by tugging firmly at the sides.
7. Remove the impact absorbing foam. Here, too, patience is the key.
8. Remove the 10mm bolt that secures the headlight to the frame. These is the first of 3.
9. Remove the 10mm bolt located to the side of the headlight. Number two!
10. Remove the third 10mm connecting the bracket to the frame
11. Remove headlight and disconnect headlight harness. There are two plug to disconnect here.
12. Remove the 10mm bolt attaching the headlight to the factory headlight bracket.

13. Remove the headlight bracket.
14. Install the headlight bracket on the new headlight and secure it with a 10mm bolt.
15. Connect the headlight harness to new headlight and place in factory position.
16. Replace all hardware by following steps 1 through 13 in reverse order.
17. Check all connections and light functions prior to driving
Related articles
9.09.2013
The 2008 Mazda6 Customized with an Rvinyl Red Carbon Fiber Dash Kit
Customer Rebate Photos Galore - The Mazda6 2008
Today's post is going to be short and sweet as it consists primarily of customer installation photos of the 2006-2008 Mazda Mazda6 dash kit in Rdash Dark Red Carbon Fiber. Rodolfo sent these in to us after purchasing them from our site here. It's pretty clear that he did an outstanding job and, for that, we not only salute him but will be issuing his $20 instant rebate.
Interested in an Rvinyl Rebate?
Piqued your interest with the Mazda6 rebate photos? Well, get the full details here: http://www.rvinyl.com/offers.html In essence, simply install any qualifying Rvinyl product (Rdash, Rwrap or Rtint) and submit at least 4 high-quality images to us. Once we review them and approve them we will issue you up to a $20 refund. Simple and easy. It's a win win for everyone.
Related articles
12.20.2012
El SRT Viper 2013 – Una Alta Gama de Pick-Me-Up
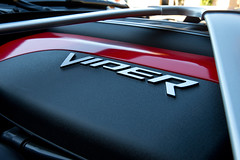
El Viper 2013 – Mas Liviano y Fuerte
El
Viper 2013 SRT va a ser definitivamente la conversaciĂłn del pueblo y es la
culminación de años de experticia en diseño y prueba. Algunos de las
caracterĂsticas más distintivas e innovadoras del Viper 2013 son, un chasis más
rĂgido y 140 libras más liviano. Para poder alcanzar un ratio mas apretado de
cambio y un toque mas confortable, los seis cambios de Tremec y un cloche doble
sin esfuerzo, para el deleite de los puristas, no hay una versión automática de
este sĂşper carro todavĂa.
El Motor SRT – Un Precio Que Vale La Pena
El
motor del SRT es quizás, la caracterĂstica mas distintiva y realmente justifica
su precio. El motor de 8.4 litros, tiene 10 caballos y es mucho mas liviano que
la versiĂłn anterior de 25 libras. Los especialistas de los accesorios de
mercado, tienen la opciĂłn de cambiar los tubos de aluminio para lograr un menor
peso, y también mejorar el torque del motor después de incrementar a 10
caballos más. Con un volante de aluminio en el lugar, incluso más libras son
arrojadas afuera y en consecuencia hacer revoluciones que sean mucho más
fáciles de construir. Para añadirle a esto, uno puede arreglar los exhaustos
llenos de sodio que ayudan a regular las temperaturas. Esto tiene un efecto
directo en el rendimiento.
Un Interior Deliciosamente Incompleto
A un
costo que solo el ultra rico y loco puede costear, puedes esperar que el Viper
tenga un interior mucho mejor equipado. Pero, como puedes ver en la foto de mas
arriba, el interior del Viper 2013 es bastante espartano, dejan atrás el hecho
de que esta envuelto en puro cuero. Igualmente, puede variar en que los
diseñadores dejaron los interiores tan espaciadamente populados de manera de
dejar espacio para los accesorios del mercado y sus modificaciones, y esto es
especialmente cierto para los asientos del Sabelt. Estos asientos pueden ser
remplazados con más espacio o un look clásico en los asientos. Pareciera ser
que las opciones son potencialmente infinitas y dependen solo en los lĂmites de
tu imaginaciĂłn y tu chequera. Si estas buscando un rendimiento verdadero,
puedes desvalijar el interior y el exterior y remplazar los asientos y otras
cosas con partes de fibra de carbĂłn. Alternativamente, el cuero real y los
accesorios de cuero, pueden añadirle una refinada elegancia al Viper, el cual
viene a ser un pedigree maravilloso de carreras con sus ajustes de fábrica.
Esta
de mas decir que el Viper SRT 2013 esta destinado a ser un clásico y es una
real belleza Americana.
Related articles
12.19.2012
Manillas de Puerta Putco para Harley-Davidson – Accesorios de Cromo
¿QuĂ© Son Las Manillas de Puerta Putco de Harley Davidson?
Las
manillas para puertas Putco de Harley Davidson son hechas de cromo ABS para la
fuerza, durabilidad y la resistencia a la corrosiĂłn. Estos kits de las manillas
de puerta se instalan fácilmente con una cinta automotriz 3M pre aplicada para
una pelada simple y una instalación rápida. No existe absolutamente ningún tipo
de corte o taladro. Y, la mejor parte de estos acentos, es que están
oficialmente licenciados y ¡hecho ahĂ mismo en los Estados Unidos!
¿Cuáles son unas de las mejores cosas de las manillas de
puertas para Harley Davidson?
·
Accesorios de vehĂculo con
licencia oficial de Harley Davidson.
·
Se instala en minutos con la
cinta pre aplicada 3M.
·
Hecho de Cromo ABS
automotriz para soportar los rigores de los elementos.
·
Demuestra tu entusiasmo por
la gran marca americana, Harley Davidson.
·
Materiales que duran mucho
tiempo, diseñados para soportar los rigores de los elementos.
¿CĂłmo instalo las manillas de puertas Putco de Harley
Davidson?
AquĂ
hay una fácil y rápida guĂa que fue hecha directamente por el sitio de Putco,
el cual demuestra que tan locamente fácil es instalar estos kits. ¡TambiĂ©n se
encuentra disponible en español y en inglés!
1. AsegĂşrate
de que la superficie de la aplicaciĂłn del corte este limpia, seca y libre de
grasa, aceite o cera. La aplicaciĂłn a la superficie debe estar caliente con una
mĂnima temperatura de 10°C (50°F).
2. Lavar
el área con agua limpia y luego secarla. Limpiar el área una segunda vez con un
paño mojado con alcohol o el K-520 Primer Adhesion Promoter para remover todos
los aceites y ceras.
3. Determinar
la locaciĂłn exacta de la pieza recortada.
4. Remover el filme protector del adhesivo,
alinearlo cuidadosamente y presionar firmemente para una adhesiĂłn adecuada.
AsĂ
que ahora puedes disfrutar de las fotos. Sigue bajando porque también ofrecemos
¡el logo de Bar y Shield Harley! ¡Feliz fin de semana!
Related articles
Subscribe to:
Posts (Atom)